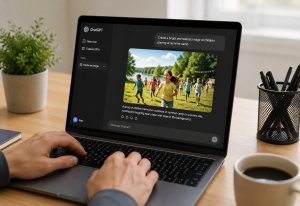
AI tools make it easy to spin up a design in minutes, but that doesn’t mean the file is ready to go straight to the press. Prepping AI artwork is the step that turns a great idea on your screen into something that looks sharp, clean, and professional on paper. In this guide, we’ll walk through how to check your AI image size, choose the right color mode and file type, and catch common AI flaws before you send anything to Redmond Imaging Solutions.

Step 1: Start with the largest AI image you can
Before you worry about formats and export settings, look at the actual size of your AI image. Prepping AI artwork always starts with checking that you have enough pixels for the piece you want to print.
Most AI tools generate images in a fixed range, often between about 1024 and 2048 pixels on the long side.
That can be fine for smaller prints, but it can get risky when you stretch that same file across a large postcard, flyer, or poster.
Practical rule of thumb:
- The bigger the final printed piece, the larger your original AI file needs to be.
- For close up items like business cards and postcards, aim for enough pixels to land around 300 dpi at the final size.
If your AI tool offers different quality or upscaling options, always download the largest, highest quality version it will give you. That gives Redmond Imaging Solutions more to work with later in the process.
Step 2: Choose a print friendly color approach
Most AI images are created in RGB color, because they are meant to look great on screens. Printing uses CMYK inks on paper, and that simple change is why some colors shift when you move from digital to print.
When you are prepping AI artwork, keep these points in mind:
- Extremely vivid, neon, or glowing colors on a screen will often look more muted on paper. Paper doesn’t glow.
- Asking AI tools for “natural” or “print‑friendly” colors in your prompts usually leads to better results when the file is converted to CMYK.
- Before final production, the team at Redmond Imaging Solutions can often adjust contrast and color balance so the piece still looks strong after conversion.
If you use design software like Adobe Photoshop or Canva, you can also preview how your AI image looks in a CMYK document before exporting your final file. This is a simple way to see if any areas look muddy or dull and need attention before you order.
Step 3: Pick the right file type for your AI artwork
Different file types are better for different stages of the print process. A big part of prepping AI artwork is picking the format that travels cleanly from your computer to the press.
Here’s a simple way to think about it:
| Stage | Common format | When to use it |
|---|---|---|
| Raw AI image download | PNG or JPG | First export from your AI image tool. |
| Image cleanup | PSD or high-res PNG/JPG via Photoshop or Canva | When you are retouching, converting to CMYK, or cropping AI images. |
| Layout creation | InDesign, Illustrator, or Canva | When you are building the full design with text, logos, and AI artwork placed into a final layout. |
| Final print-ready file | PDF (preferred) | When your design is complete and ready to send to Redmond Imaging Solutions for printing. |
A few practical tips:
- PNG is often the default from AI tools; it’s fine to start with, especially if you need a transparent background.
- For complex pieces, dropping the AI image into a layout program (InDesign, Illustrator) and exporting a high quality PDF is usually the safest way to deliver a print ready file.
- Avoid sending tiny screenshots or images pulled from social media; those are rarely suitable for professional printing.
If you’re not sure which format is best for your project, send what you have and ask Redmond Imaging Solutions which final version they prefer.

Step 4: Watch out for AI flaws that jump out in print
Some AI quirks are easy to miss on a backlit screen but become obvious the moment you see a physical proof. Prepping AI artwork means catching these issues before they end up on a stack of postcards.
Common problems to look for include:
- Distorted hands or faces
- Odd edges or “melting” shapes around objects
- Noise or speckling in flat areas like skies and backgrounds
- Over sharpened details that look crunchy instead of clean
Customers often miss these flaws for two reasons:
- On a small screen, the image is viewed at a reduced size, which hides the details.
- Bright screen light makes colors and contrast look better than they will on paper.
A simple fix is to zoom in to 100% or higher on your computer and scan the important areas: faces, hands, logos, and any smooth background. If something looks strange on screen at full size, it will probably look even more noticeable in print.
If you find problems you cannot easily retouch in Photoshop or Canva, it’s often better to regenerate the AI image or ask Redmond Imaging Solutions for help rather than printing something that feels “off.”
Step 5: Build the final layout and add bleed
Even if your AI image looks great, you still need a proper layout before it’s truly print‑ready. This is where you add text, logos, and the technical details that protect the edges of your design.
For most marketing pieces, a good prepping AI artwork process includes:
- Placing the AI image into a layout that matches the final trim size (for example, a postcard or brochure size) in InDesign, Illustrator, or Canva.
- Extending background color or images slightly past the edge to create a bleed, so there are no thin white lines after trimming.
- Keeping important text and logos pulled in from the edge so they don’t risk being cut off.
Many popular tools, including InDesign, Illustrator, and Canva, offer templates with bleed and safety margins built in. Picking one of those templates is an easy way to be sure your AI artwork and text are positioned correctly from the start.
Once the layout looks right, export a high‑quality PDF with bleed and crop marks if your software allows it. That file is usually what Redmond Imaging Solutions will prefer.

Step 6: Do a quick pre print checklist
Before you upload or email your files, take one last pass. A short checklist makes prepping AI artwork feel manageable instead of technical.
Ask yourself:
- Did I download the largest, cleanest version of my AI image?
- Does the image still look clear and natural when I zoom in on faces, hands, and key details?
- Did I use Photoshop or Canva to clean up and, if needed, convert the image to CMYK?
- Does the design in InDesign, Illustrator, or Canva include bleed where needed and keep important text away from the edges?
- Did I export a final print‑ready PDF instead of just a small web image?
If you’re unsure about any of these answers, that is the perfect moment to pause and ask Redmond Imaging Solutions for a quick file review. Catching an issue now is much easier than fixing it after something has already been printed.
Prepping AI artwork does not have to be complicated. A few simple habits—starting with a large image, choosing print‑friendly colors, picking the right file type, scanning for common AI flaws, and exporting a proper layout—go a long way toward getting results you’re proud to hand to customers.
When in doubt, send your files and your goals to Redmond Imaging Solutions; the team can confirm that your AI ideas will hold up in the real world before anything goes on press.
Not sure if your AI images are really ready for print? Send your files to Redmond Imaging, and the team will check resolution, color, and file type so you can order with confidence.