Why is it important to export Canva files with bleeds?
If you’re designing for print and want a polished, professional look, it’s essential to export Canva files with bleeds. Bleeds ensure that color, images, or background elements extend all the way to the edge of the finished piece—without leaving any unwanted white margins.
Imagine cutting a photo out of paper with scissors: even the smallest misalignment can leave a sliver of white around the edge. The same thing can happen in printing. That’s why we print artwork slightly larger than the final size and trim it down to fit—this prevents visible imperfections at the edges.
Fortunately, setting up and exporting Canva files with bleeds is simple. Follow the six easy steps below to ensure your print files are perfectly prepared.
Creating bleeds in Canva is simple. Follow the six easy steps below to set them up correctly.
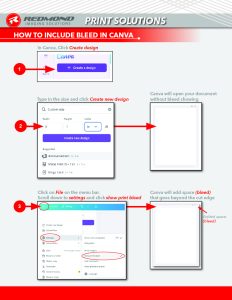
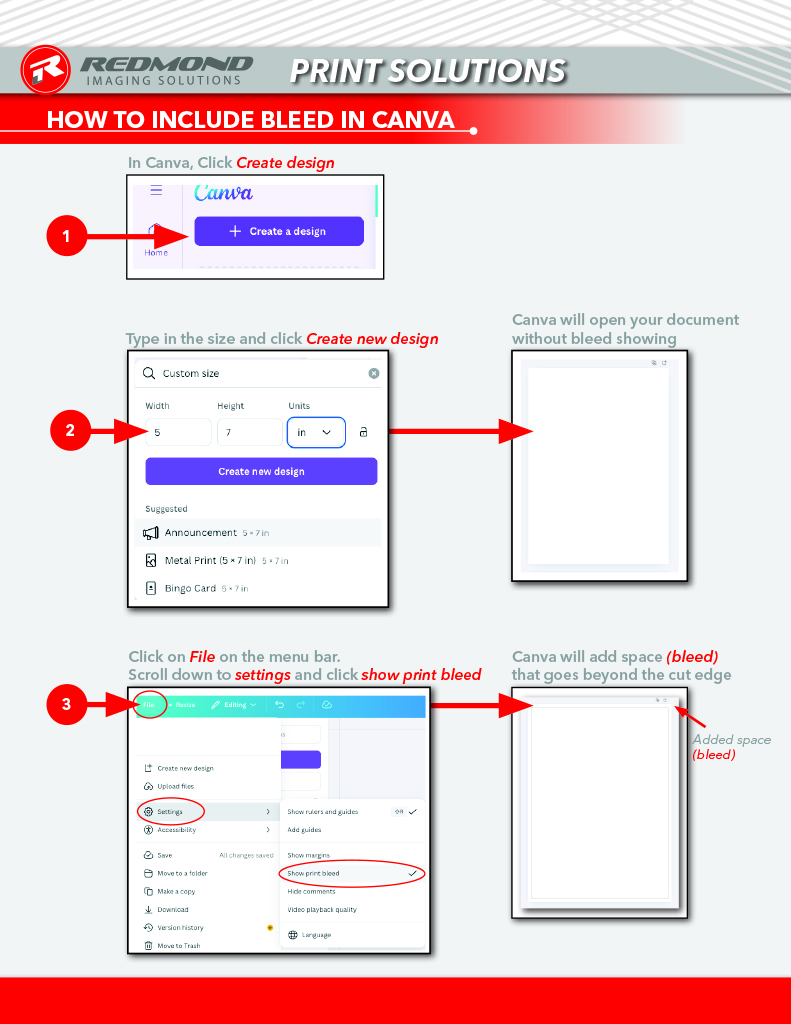
- In Canva, Click “Create design”
- Type in your desired size and click “Create new design”
Canva will open your document without a bleed area showing. - Click on File on the menu bar, scroll down to settings and click show print bleed
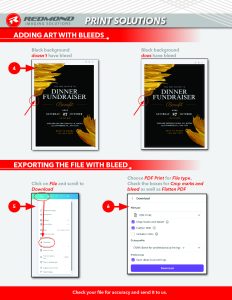
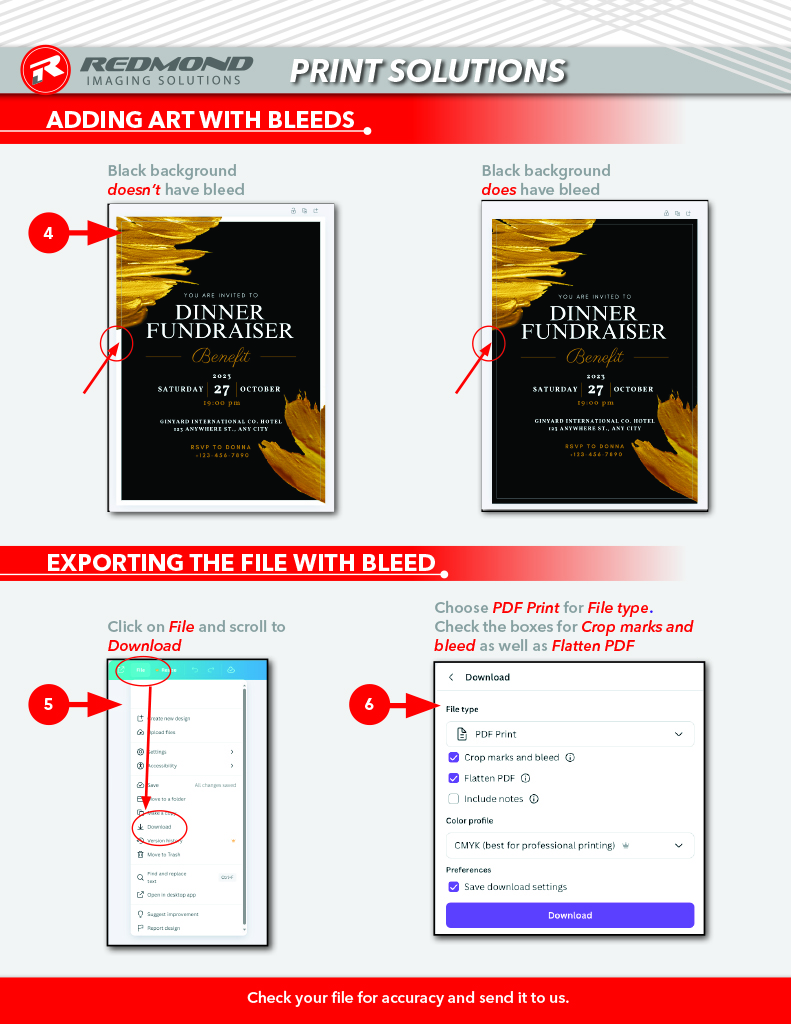
Canva will visually add extra space for bleed. - Add your artwork with bleed included
Make sure your artwork goes past the cut edge and extends to the bleed edge. Once your art is complete, it is time to export your file and include the bleeds in your export. - Click on “File” and scroll to “Download”
Choose PDF Print for File type. Check the boxes for Crop marks and bleed as well as Flatten PDF - Choose “PDF Print” for File type. Put checks in the boxes labeled “Crop marks and bleed” as well as “Flatten PDF”
Once your document is printed, the bleed area gets cut off in the finishing process.